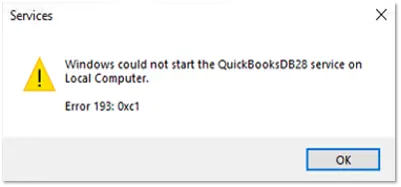
If you encounter QuickBooks Error Code 193 while opening or using QuickBooks in multi-user mode or while starting the QuickBooks database server manager, this section is essential reading. This error prevents you from accessing the accounting software’s programs and features. Furthermore, Quickbooks error 193:0xc1 is a store exchange error that can occur when using the database server manager. The following warning accompanies this QuickBooks error message:

You may see the following error message when it occurs:
| Error | Description |
|---|---|
| Warning | Error 193: 0xc1, Unable to start the service error. |
| Warning | Error 193: Services – Windows could not start the QuickBooksDBXX service on Local Computer. |
If you’re experiencing the same issue repeatedly, reading this section might be helpful. To delve deeper into this topic, pay close attention to this segment. Alternatively, you can contact our tech support team for immediate assistance and guidance.
What are the Causes Behind QuickBooks Error 193?
To resolve QB error 193 effectively, it’s crucial to understand the underlying causes. When this error occurs, you’ll encounter a pop-up message stating, “Error- 193 Primary key for debt keywords is not unique.” This pop-up appears whenever you attempt to send a mailbag from headquarters to a remote store.
The error can arise due to the following reasons:
- Duplicate department names or codes exist in the system
- The .qbw files are corrupt or damaged
- Customer names have been merged or deleted
How can I Troubleshoot Store Exchange Errors (193, 175305, 173411, and 175414)?
To address the error codes, follow the detailed steps below. Our technical support team for QuickBooks error codes is always available if you need assistance during the troubleshooting process.
Solution 1: Windows 10 / Server 2016 version 1803 Update
Please visit Microsoft KB4100403 and KB4338548 for information on how to resolve this error.
KB4338548 has a link to the Microsoft Update Catalog. From there, choose the appropriate Microsoft update. If you are uncomfortable doing this, please consult with an IT professional.
To work with the Remote Store, follow these steps to send a mailbag to headquarters and receive it:
- Go to Customer > Customer List.
- Select the desired customers. To select multiple customers, press and hold the Shift key while clicking on the first and last names.
- Delete the selected customers.
Method 2: Delete .qbt files in headquarters and remote store
This solution focuses on deleting the .qbt files from both the Headquarters and Remote stores. Afterward, a new remote .qbt file needs to be created.
Step 1: Deleting the .qbt files at Headquarters
- Navigate to the following path on your Windows operating system: C:/Program Data/ Intuit/ QuickBooks Point of Sale x.x / STex.
- Check all folders for any .qbt files and delete them if found.
Step 2: Deleting the .qbt files at the Remote Store
- Open the search box and type “.qbt.”
- Delete all .qbt files found in the search results.
- Close all windows and empty the Recycle Bin.
Step 3: Create a New Remote File
- Select the Files > Company Operations > Create New Company option.
- Enter the Company Name > Select Remote Store and fill in the store number.
- Resend the mailbag from Headquarters to the Remote Store.
Method 3: Clean Install QuickBooks Desktop
In order to fix the QuickBooks multi-user mode error 193, you can perform a clean installation of QuickBooks Desktop. The steps to be followed are as follows:
- On the system, click the Windows Start tab.
- Open the Control Panel by clicking on it.
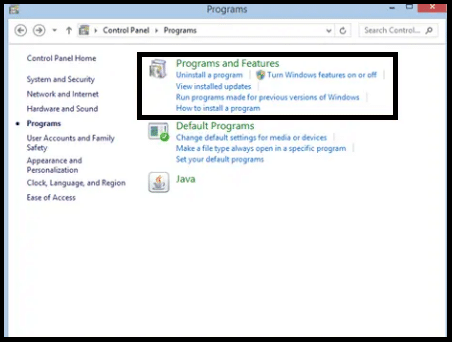
- Select “Programs and Features” or “Uninstall a Program.”

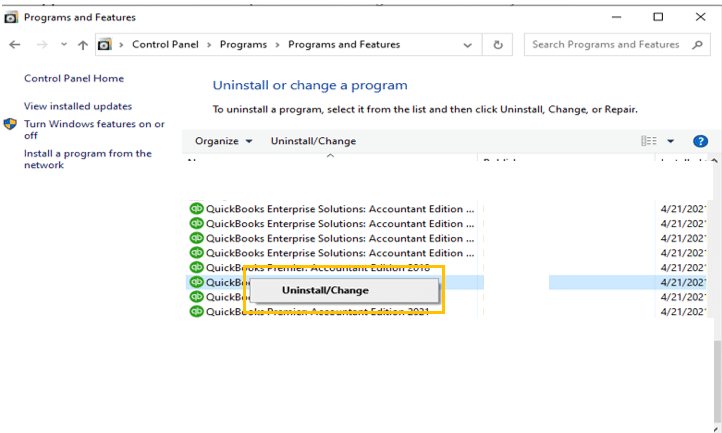
- From the list of installed programs, choose QuickBooks Desktop.
- Select the “Uninstall/Change” option and then “Remove.“

- Reinstall QuickBooks Desktop by clicking “Next” in the final step.
Method 4: Update QuickBooks Point of Sale
- Navigate to the Point of Sale.
- Select “Help” from the menu bar, then choose “Software Updates” and click “Check for Updates.“
- Once the updates have been installed, attempt the storage exchange again.
Method 5: Delete Customers in QuickBooks
It is also possible to get rid of this error code by deleting customers in QuickBooks. Here are the steps to follow:
- To begin, launch QuickBooks and select the “Reports” tab.
- Next, Select “Customer Lists.“
- A list of customers will appear on the screen. Choose the first customer.
- Double-click on the customer’s name.
- Open the customer’s list.
- Select all options and then choose “I want to.“
- Choose “Delete the customer.“
- Select the “File” menu, then choose “Utilities” and “Resend.“
- Examine the store’s mailbag.
- Finally, launch QuickBooks and check if the error is fixed.
To resolve QuickBooks error code 193, you can try the three solutions provided above. If you encounter any challenges while following these steps, feel free to reach out to our knowledgeable QuickBooks Point of Sale support experts for assistance.
Frequently Asked Questions
How to fix Connection Errors in QuickBooks?
Here are some steps that the user can try to resolve the issue:
- Refresh the Page: Click the reload button or press F5 on the keyboard (Command + R on Mac) to download the entire page again.
- Restart Browser and Log in Again: If the problem persists, exit and restart the browser. Then, log in to QuickBooks Online.
How to Resolve QuickBooks Error 193?
- Several common factors, including an outdated driver, a corrupted system file, or incompatibility with NordVPN can cause this error.
- To resolve this issue, you can try running the Hardware and Devices Troubleshooter, performing a System File Checker scan, or uninstalling NordVPN, if applicable.
How to fix Windows Firewall Blocking in QuickBooks?
Manual Steps to Resolve QuickBooks Firewall Issue:
- Configure Firewall Port Exception for QuickBooks: Ensure QuickBooks has the necessary firewall port exception.
- Create Windows Firewall Exceptions for QuickBooks Programs: Set up Windows firewall exceptions for QuickBooks-related programs.
- Review Antivirus and Firewall Settings: Check your antivirus and firewall software settings.
- Add QuickBooks Ports Exception to Antivirus or Firewall: Include QuickBooks ports in the exception list of your antivirus or firewall.
- Restart Your Computer: Restart your computer to apply the changes.


 +1-800-596-0806