QuickBooks PDF Component Missing: Complete Solutions

Today, QuickBooks users report QuickBooks Missing PDF Component errors when printing PDFs. Troubleshooting this issue is a hassle, especially when […]

Today, QuickBooks users report QuickBooks Missing PDF Component errors when printing PDFs. Troubleshooting this issue is a hassle, especially when you don’t understand why it occurs. Here’s an in-depth guide that will explain this issue and assist you in troubleshooting it. Whenever a user tries to print PDF, QuickBooks throws an error message “QuickBooks detected that a component required to create pdf files is missing.” In the error message, it is not explained what component is missing or how to resolve the issue.

Save Time, Reduce Errors, and Improve Accuracy

Dancing Numbers helps small businesses, entrepreneurs, and CPAs to do smart transferring of data to and from QuickBooks Desktop. Utilize import, export, and delete services of Dancing Numbers software.

When this particular error arises, you may receive an error message on the window that says the component needed for PDF Print in QuickBooks is absent. However, when these printing issues arise they can be very frustrating. These particular printing issues are quite normal and common in QuickBooks applications and these can restrict you from printing your particular documents.

Table of Contents

What is the QuickBooks Missing PDF Component Error?

At times, QuickBooks users experience difficulties when attempting to either convert their files into PDFs or print them. A common error message that may appear, “QuickBooks detected that a component pdf is missing.” Unfortunately, this error messages can be cause panic among users as it doesn’t specify which component is missing. Moreover, it makes it difficult to identify the root cause of the error. With our detailed blog, you don’t have to worry about the reasons and consequences troubleshooting solutions for you to implement and resolve the QuickBooks missing component pdf error.

QuickBooks Missing PDF Component

When hitting the Send Email option, I receive this error.

Keep in mind that Windows 11, Office, and QuickBooks are all fresh installations. The Office apps work perfectly to send attachments via Outlook and to print to PDF.

What issues have you heard with Windows 11/QuickBooks When Printing or Emailing? I could seeanother app presenting a problem if the system has been running for a time.

Possible Causes of “Component Required for Pdf Print from QuickBooks is missing” Error

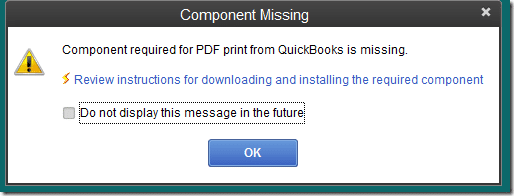
QuickBooks missing PDF component problem arises due to several reasons as given in the list below:

QuickBooks Missing Component Error
  • An outdated version of the Adobe Reader program.
  • A damaged or missing Adobe Reader application is one of the most obvious reasons behind the error.
  • If the Microsoft XPS document writer is switched off in the Windows settings.
  • Often, an outdated version of your QuickBooks application can give rise to the error.

What are the Possible PDF Errors QuickBooks Users Experience?

Here is the list:

  • Missing PDF Component
  • Unable to Create and Print PDF
  • Driver not Working
  • Unable to Print with the Printer Due to Connection Problems
  • QuickBooks Error 1801 or Error 1722

Solution Steps to Fix QuickBooks Detected that a Component Required to Create PDF

Let us discuss how to fix the QuickBooks PDF component missing issue with the help of effective troubleshooting steps and what are the possible reasons for it.

Solution 1: Update QuickBooks Desktop to the Latest Release

You need to upgrade your particular QuickBooks software to the latest release, in order to fix QuickBooks cannot create PDF problems. Check our detailed article on how to update QuickBooks to the latest release and check if the error persists.

An outdated version of your particular QuickBooks application can be the very reason for the different technical issues in the applications. One such technical glitch is, QuickBooks discovered a component needed to create PDF files is missing. Such an issue usually prompts when the user has an outdated version of QuickBooks Desktop.

In order to fix this issue, it is a must that you update QuickBooks, then visit the QuickBooks Download and Update web-page and proceed further with the help of the steps given below:

  • The second step is that you give the necessary details like Version, Country, Product, etc.
Download QuickBooks Updates
  • Once you have provided all the details, press on Search.
  • Now, Hit on the option Get Latest Updates and press Save.

Note: Select the best download location on your particular computer and then you install the downloaded file in order to complete the task. In case QuickBooks fails to complete the present action because of a missing component error message displays on the window again, shift to the next location.

Solution 2: Update and Repair Impaired Adobe Acrobat Reader

An Adobe Acrobat Reader, which is damaged or outdated, can also lead to QuickBooks cannot create PDF issues. To fix this issue, please follow the steps given below:

Step 1: Look for the Update

  • Hit on the icon that says Windows Start and type Adobe in the particular search box.
  • Now look and press Adobe Reader from the particular list of applications.
Update Adobe Reader
  • From the particular Help tab, choose the Check for Updates option.
  • Follow the instructions given step-by-step in order to install the updates.

Step 2: Fix the Adobe Acrobat Reader

  • First, close the applications that are working on the particular computer.
  • Now, click Windows + R keys and then the Run window will display.
  • Now press “appwiz.cpl” in the particular Run box and press Enter.
  • Now, you are required to press Adobe Reader and choose Uninstall/Change.
Fix the Adobe Acrobat Reader
  • Now again, press the Next tab and then click Install.
  • Finally, Hit on Finish in order to complete the task.

Solution 3: Activating and Enable Microsoft XPS Document Writer

In this particular solution, We will assist you to repair the QuickBooks Missing PDF Component error. We will do it by activating the Microsoft XPS document writer from the on and off settings feature of windows. It will help in dealing with the QuickBooks detected that a component needed to create PDF files is missing very smoothly.

Here are the Steps to do it:

Activating the MS XPS Document Writer
  • Click Windows + R together with R in order to start the Run.
  • Now add “appwiz.cpl” inside the particular Run text field, and then press Enter.
  • Now, on the left side of the Feature and Program window, click on the Turn Windows Features on or off.
  • Now press on the checkbox that is right next to the Microsoft XPS Document Writer in order to allow the XPS document writer.
Windows Turn Windows features on or off Microsoft XPS Document Writer

Solution 4: Use QuickBooks Print & PDF Repair Tool to Resolve the Error

QuickBooks Print & PDF Repair Tool is specifically designed to resolve a number of Print & PDF related errors.

Download & Install QuickBooks Tool Hub on Your System

The first step is to download the QuickBooks Tool hub and install it. You need to do it from the official website. Now, install it in the right manner and then when the install is complete, you need to start the QuickBooks Tool hub.

Run QuickBooks PDF & Printed Repair Tool from QB Tool Hub

Use the Program problem to repair PDF and Print issue

  • First, start the QuickBooks Tool hub by double-clicking on the particular icon of the QuickBooks Tool hub
  • Look for QuickBooks PDF & Printed Repair Tool, select it and let the tool run.
  • In the particular home window of the QuickBooks Tool hub, choose the Program Problems tab
  • Finally, try to Save or Print the particular PDF

Solution 5: Reset Permission for Your TEMP Folder

QuickBooks may be unable to access the file required for PDF Print because of permission difficulties with your TEMP folder. The steps mentioned below will help you resolve the “Component Required for PDF Print from QuickBooks is missing” error by resetting the permissions for the Temp folder.

Step 1: To Full Control Set Temp Folder Permissions

  • By pressing the Window + R keys simultaneously on your keyboard open the RUN command window.
  • A dialog box will appear on your screen, then you have to type %TEMP% and press the Enter key.
  • After that, right-click on the empty area in the Temp folder and choose the Properties option from the drop-down menu.
TEMP Folder Full Control Access
  • Then go to the tab of Security.
  • Lastly, on the Security tab, You have to ensure that all user names and groups have Full Control.

If you want to set the permission for any user name or group to Full Control

  • Select the user or group name by clicking the Edit button under the Security tab.
  • Then mark the Allow checkbox that is next to Full Control.
  • To save the changes you’ve made, you must finally click the OK button.

Step 2: Verify that You are Able to Print to XPS (Only for Save as PDF and Email Issues)

  • Open the Windows Start menu or type Window + R keys simultaneously to open the RUN command window.
  • In the dialog box type Notepad and click ok. Notepad will open on your screen.
  • You have to go to the File menu and then from the drop-down menu select the Print option.
  • Then select XPS Document Writer and then click on the Print button.
  • Do the naming of the file and then locate it on your Windows desktop.
  • Lastly, on the desktop view the XPS document that you have printed from your notepad.

Solution 6: Set the PDF Viewer as the Default Program

The QuickBooks PDF Missing Component issue could appear if you don’t have a program set up as your default PDF viewer. To solve this issue with Windows 10, you have to follow the following steps:

  • Select the Settings icon from the Start menu.
  • Default Apps are followed by Choose Apps.
  • You must scroll until you find .pdf and then you have to choose its default program.
  • You have to select QuickBooks to Locate PDF Viewer or another PDF viewer from the list if you have one installed on your computer.
  • You have to click Switch Anyway and the process is finished.

Hopefully, the missing PDF component won’t pop up again.

Solution 7: Test, Adjust and reinstall XPS Document Writer Permissions (Users using Windows and not Terminal Services)

Before implementing these solutions, you should keep the following in mind:

  • Microsoft apps are not supported by Intuit. Therefore, if you experience issues like Missing Components in QuickBooks Desktop, they won’t be liable.
  • It is advised to get help from IT experts when you are unable to fix the issue on your own.

Step 1: Run a Test on the XPS Document Writer and Print Outside the QB App

Follow these steps to fix QuickBooks 2018’s “Missing Manual PDF” issue:

  • Choose Print from the File menu by going there.
  • In the print box, choose the Microsoft XPS Document Writer from the printer list. Pick Print from the menu.
  • On your computer’s desktop, save the file with the .XPS extension in a location that is simple to find.
  • Go to this desktop now, and look for the .XPS file:
  • If an error occurs when you access the .XPS file or it doesn’t open properly when you try to open it, you should reinstall the Microsoft XPS Document Writer.
  • If you are unable to see any files and no errors are displayed when saving, the security settings may be the cause of your problem. It can make printing difficult. Also, it is possible that after you created the .XPS file, it was erased. See whether using the QuickBooks Component Repair Tool can solve this problem.
  • You will be requested to reinstall the printer if there is an issue with printing or if the XPS Document writer is not visible.

Step 2: Reinstall Microsoft XPS Document Writer

If you need to reinstall the Microsoft XPS Document Writer, follow these processes. Depending on the Windows version 11 you are using, the steps may change.

For Windows 8:

  • You have to Start the menu.
  • Go to the settings for your system and then you have to select the Control panel from here.
  • Tap the Devices and Printers option once again.
  • Select the Microsoft XPS Document Writer icon at this point. Then select Remove device from the menu.
  • Tap Yes to accept the change.
  • From the toolbar, you have to select Add a printer.
  • After that, select Add a local printer or Network Print with Manual Preferences.
  • In the Use an existing port box, select PORTPROMPT: (Local port), then click Next.
  • Select Microsoft under “Manufacturers” by tapping it. Select Microsoft XPS Document Writer v4 after that. Finally, click Next.
  • Select Replace Current Driver from the menu. To succeed you have to select Next.
  • In the printer name field, remove v4 from the name of the Microsoft XPS Document Writer.
  • Then you have to unmark the box to make XPS your default printer by clicking Finish.

For Windows 7/ Vista:

  • Begin by going to the Windows start menu to look for Devices and Printers.
  • Pick Microsoft XPS Document Writer from the list. Select Remove Device from the menu.
  • Verify your choice by selecting Yes.
  • Then you have to select Add a local printer from the toolbar to add a printer.
  • Then you have to select the option that states Use an existing port.
  • Next, select XPS Port: (Local Port).
  • From the manufacturer’s list, select Microsoft. Select Microsoft XPS Document Writer v4 at this point. At last, you have to click Next.
  • You have to select the option. Click Next to replace the existing driver and complete the process.

Solution 8: Edit the Security Software Settings

Security software settings such as Norton Antivirus or McAfee Firewall may prevent the creation of .XPS files. Check these options to make sure they are not disabled.

You should think about asking your system administrator, network administrator, and the company from whom you bought the security software for help in these cases.

In this article, we have guided you with all the possible routes to fix the QuickBooks PDF component missing errors problem. You need to follow each and every trouble-shooting step in the given order.

However, for some, fixing such errors on their own can be a daunting task. This is when you should hire professional help.

For all kinds of professional help related to QuickBooks PDF component missing error, You can connect with the Dancing Numbers experts via LIVE CHAT.

Accounting Professionals, CPA, Enterprises, Owners
Accounting Professionals

Looking for a professional expert to get the right assistance for your problems? Here, we have a team of professional and experienced team members to fix your technical, functional, data transfer, installation, update, upgrade, or data migrations errors. We are here at Dancing Numbers available to assist you with all your queries. To fix these queries you can get in touch with us via a toll-free number
+1-800-596-0806 or chat with experts.


Frequently Asked Questions (Faqs)

How to Fix QuickBooks can’t Complete the Current Action Due to a Missing Component?

● Download and Install QuickBooks Tool Hub.
● Then Run Print and PDF Repair Tool.
● After that, reset the temporary folder permission.
● Now ensure that XPS can print.
● Lastly, check print settings.

What to do When QuickBooks Error Shows – You do not have a PDF Viewer Installed on Your Computer?

Set the Adobe Reader as the Default PDF Viewer

If Adobe Reader isn’t set as the default program for viewing documents, QuickBooks won’t recognize it. Make sure you have a PDF Reader (perhaps Adobe Acrobat Reader) installed on your computer before proceeding with the procedures listed below.

For Windows 7, 8, 8.1 users

● Click on the window key on the keyboard and type control panel in the dialog box.
● In the control panel select Programs.
● Then click on set default programs.
● Search and select Adobe Reader.
● As a default select set this program.

For Windows 10 Users

● Press Windows key at the keyboard.
● Then click on the settings icon and then go to Apps and from the default apps on the left panel.
● Now search.PDF and click on it and set it as the default program.
● Then from the list of programs, search and select Adobe Acrobat Reader.
● Lastly select switch anyway.

QuickBooks Could not Create the Necessary PDF Files, Unable to Save Forms or Reports as a .PDF. Using Windows 10. What to do?

To fix the issue you need to change the storage settings:

● Firstly, open the PDF file with Adobe Acrobat.
● Then go to the Edit Menu and then select Preferences.
● After that, select the General option and then uncheck the box for show online storage at the time when saving files.
● To save the settings, at the bottom click on OK.

What if the File Doesn’t get Saved Because of the QuickBooks Missing PDF Component Error?

If QuickBooks’ PDF file won’t save, you have to check the storage settings as described below:

● Use Adobe Acrobat to open your PDF file on the computer.
● Select the Preferences option from the Edit menu by tapping it.
● Access the General tab.
● Uncheck the Show online storage option when you save your files.
● In order to save these settings, you have to click OK at the bottom.

Are there any other Methods to Fix the QuickBooks Missing PDF Component Error?

The following steps can be taken to prevent the error from appearing:

● Turn on XPS services.
● You can Install or repair the MSXML 6.0.
● For your form create a new template in the program.
● For terminal services, do not use your system’s print spooler service.
● Verify the XPS Document Writer’s Windows User Permissions.

Features of Dancing Numbers for QuickBooks Desktop

Imports

Imports

Exports

Exports

Deletes

Deletes

Customization

Customization

Supported Entities/Lists

Dancing Numbers supports all QuickBooks entities that are mentioned below:-

Customer Transactions

Invoice
Receive Payment
Estimate
Credit Memo/Return Receipt
Sales Receipt
Sales Order
Statement Charge

Vendor Transactions

Bill
Bill Payment
Purchase Order
Item Receipt
Vendor Credit

Banking Transactions

Check
Journal Entry
Deposit
Transfer Funds
Bank Statement
Credit Card Statement
Credit Card Charge
Credit Card Credit

Employee Transaction / List

Time Tracking
Employee Payroll
Wage Items

Others

Inventory Adjustment
Inventory Transfer
Vehicle Mileage

Technical Details

Easy Process

Bulk import, export, and deletion can be performed with simply one-click. A simplified process ensures that you will be able to focus on the core work.

Error Free

Worried about losing time with an error prone software? Our error free add-on enables you to focus on your work and boost productivity.

On-time Support

We provide round the clock technical assistance with an assurance of resolving any issues within minimum turnaround time.

Pricing

img

Importer, Exporter & Deleter

*See our Pricing for up to 3 Company Files

$199/- Per Year

Pricing includes coverage for users
  • Services Include:
  • Unlimited Export
  • Unlimited Import
  • Unlimited Delete

img

Accountant Basic

*See our Pricing for up to 10 Company Files.

$499/- Per Year

Pricing includes coverage for users
  • Services Include:
  • Importer,Exporter,Deleter
  • Unlimited Users
  • Unlimited Records
  • Upto 10 companies

img

Accountant Pro

*See our Pricing for up to 20 Company Files.

$899/- Per Year

Pricing includes coverage for users
  • Services Include:
  • Importer, Exporter, Deleter
  • Unlimited Users
  • Unlimited Records
  • Up to 20 companies

img

Accountant Premium

*See our Pricing for up to 50 Company Files.

$1999/- Per Year

Pricing includes coverage for users
  • Services Include:
  • Importer, Exporter, Deleter
  • Unlimited Users
  • Unlimited Records
  • Up to 50 companies

Dancing Numbers: Case Study

Frequently Asked Questions

 
How and What all can I Export in Dancing Numbers?

You need to click "Start" to Export data From QuickBooks Desktop using Dancing Numbers, and In the export process, you need to select the type you want to export, like lists, transactions, etc. After that, apply the filters, select the fields, and then do the export.

You can export a Chart of Accounts, Customers, Items, and all the available transactions from QuickBooks Desktop.


How can I Import in Dancing Numbers?

To use the service, you have to open both the software QuickBooks and Dancing Numbers on your system. To import the data, you have to update the Dancing Numbers file and then map the fields and import it.


How can I Delete in Dancing Numbers?

In the Delete process, select the file, lists, or transactions you want to delete, then apply the filters on the file and then click on the Delete option.


How can I import Credit Card charges into QuickBooks Desktop?

First of all, Click the Import (Start) available on the Home Screen. For selecting the file, click on "select your file," Alternatively, you can also click "Browse file" to browse and choose the desired file. You can also click on the "View sample file" to go to the Dancing Numbers sample file. Then, set up the mapping of the file column related to QuickBooks fields. To review your file data on the preview screen, just click on "next," which shows your file data.


Which file types are supported by Dancing Numbers?

XLS, XLXS, etc., are supported file formats by Dancing Numbers.


What is the pricing range of the Dancing Numbers subscription Plan?

Dancing Numbers offers four varieties of plans. The most popular one is the basic plan and the Accountant basic, the Accountant pro, and Accountant Premium.


How can I contact the customer service of Dancing Numbers if any issue arises after purchasing?

We provide you support through different channels (Email/Chat/Phone) for your issues, doubts, and queries. We are always available to resolve your issues related to Sales, Technical Queries/Issues, and ON boarding questions in real-time. You can even get the benefits of anytime availability of Premium support for all your issues.


How can I Import Price Level List into QuickBooks Desktop through Dancing Numbers?

First, click the import button on the Home Screen. Then click "Select your file" from your system. Next, set up the mapping of the file column related to the QuickBooks field. Dancing Numbers template file does this automatically; you just need to download the Dancing Number Template file.

To review your file data on the preview screen, just click on "next," which shows your file data.


What are some of the features of Dancing Numbers to be used for QuickBooks Desktop?

Dancing Numbers is SaaS-based software that is easy to integrate with any QuickBooks account. With the help of this software, you can import, export, as well as erase lists and transactions from the Company files. Also, you can simplify and automate the process using Dancing Numbers which will help in saving time and increasing efficiency and productivity. Just fill in the data in the relevant fields and apply the appropriate features and it’s done.

Furthermore, using Dancing Numbers saves a lot of your time and money which you can otherwise invest in the growth and expansion of your business. It is free from any human errors, works automatically, and has a brilliant user-friendly interface and a lot more.


Why should do you change the Employee status instead of deleting them on QuickBooks?

If you are unable to see the option to terminate an employee on your list of active employees on the company payroll, this mostly implies that they have some history. Thus, if you change the employee status instead of deleting it on QuickBooks, the profile and pay records remain in your accounting database without any data loss in your tax payments.


Is it possible to use the Direct Connect option to sync bank transactions and other such details between Bank of America and QuickBooks?

Yes, absolutely. You can use the Direct Connect Option by enrolling for the Direct Connect service which will allow you access to the small business online banking option at bankofamerica.com. This feature allows you to share bills, payments, information, and much more.


Why should do you change the Employee status instead of deleting them on QuickBooks?

If you are unable to see the option to terminate an employee on your list of active employees on the company payroll, this mostly implies that they have some history. Thus, if you change the employee status instead of deleting it on QuickBooks, the profile and pay records remain in your accounting database without any data loss in your tax payments.


What are the various kinds of accounts you could access in QuickBooks?

QuickBooks allows you to access almost all types of accounts, including but not limited to savings account, checking account, credit card accounts, and money market accounts.

Get Support

Bulk import, export, and deletion can be performed with simply one-click. A simplified process ensures that you will be able to focus on the core work.

Worried about losing time with an error prone software? Our error free add-on enables you to focus on your work and boost productivity.

Close X
Call Now+1-800-596-0806
Top