QuickBooks Install Error Code 1722 is a Windows installation error. It happens when system files are corrupted, required components are missing, or other programs cause conflicts. This error can block QuickBooks Desktop from installing or updating, affecting business operations.
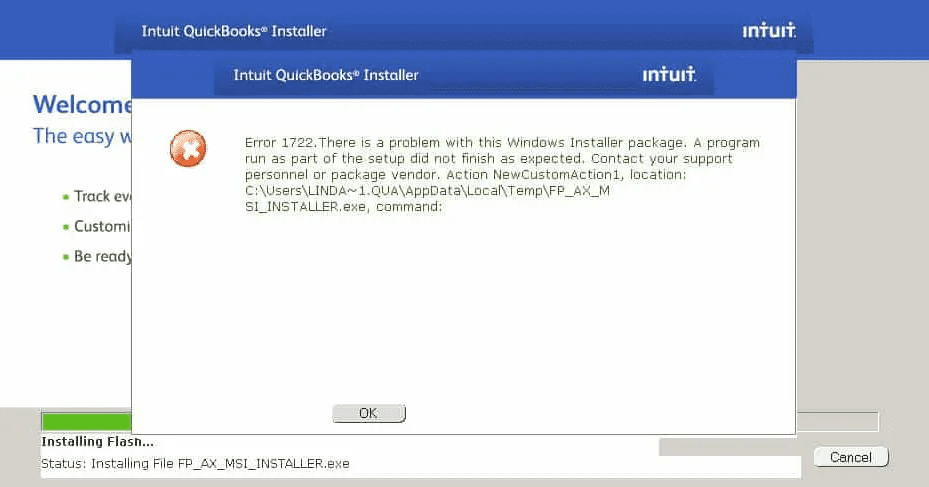
| Warning: | Error 1722: There is a problem with this Windows Installer Package. A program run as part of the setup did not finish as expected. |
| Error: | System Error Code: 1722. The RPC Server is unavailable |
Follow the 8 methods below to find the cause, fix the error, and complete the QuickBooks installation.
Method 1: Restore your System to the Initial Point

- Click the Start button and type System Restore, then press Enter.
- In the results window, select System Restore.
- Enter the Administrator Password (user ID and password).
- Follow the on-screen instructions and select a restore point.
- Restart your computer and open QuickBooks.
Method 2: Repair System Registry
- Repair registry entries related to Error 1722.
- Perform a full system scan to detect and fix issues.
- Remove temporary files and folders using Disk Cleanup.
- Update all PC device drivers.
- Uninstall and reinstall the QuickBooks program linked to Error 1722.
- Use the Windows System File Checker to scan and repair corrupted files.
- Install all available Windows updates.
- If the error persists, perform a clean installation of Windows.
Method 3: Perform a Clean Install of Windows
- Remove the QuickBooks program related to Error Code 1722.
- Reinstall the QuickBooks software. If the issue persists, it may be caused by a specific program. Reinstalling QuickBooks may resolve Error 1722.
For Windows 7 and Windows Vista
- Press the Start key and go to Programs and Features.
- Open Control Panel.
- Select Programs, then Programs and Features.
- Search for and locate QuickBooks Error 1722-related applications and files.
- Click the QuickBooks-associated entry.
- Select Uninstall from the top menu.
- Follow the on-screen instructions to complete the uninstallation of the Error 1722 associated program.
For Windows XP:
- Press the Start key and select Programs and Features.
- Go to Control Panel settings.
- Choose the Programs option.
- Hover over Add or Remove Programs.
- Search for and identify QuickBooks Error 1722-related programs and files.
- Click the QuickBooks-associated entry.
- Select the Remove button on the right.
- Follow the on-screen instructions to uninstall the Error 1722 associated program.
For Windows 8/10/11
- Move the cursor to the bottom left of the screen and click the Start Menu image.
- Right-click to open the Start Context Menu.
- Select Programs and Features.
- Search for and locate QuickBooks Error 1722 related programs and files under the Name column.
- Click the QuickBooks-associated entry.
- Click Uninstall/Change from the top menu.
- Follow the on-screen instructions to uninstall the Error 1722-associated program.
- Reinstall the program according to Intuit Inc. guidelines.
Method 4: Run Windows File Checker
- Press the Start button.
- Type Command in the search box, but do not press Enter.
- Press and hold the CTRL and Shift keys simultaneously, then press Enter.
- A permission dialog box will appear.
- Click Yes.
- A black window will open with a flickering cursor.
- Type sfc/scannow and press Enter.
The System File Checker will scan for Error 1722 and other system issues (this process may take some time). Follow the on-screen steps to complete the scan.
Method 5: QuickBooks Repair Tool
- If you know the QuickBooks file location, click the Select File option.
- If you don’t know the file location, click the Search File tab.
- Click Scan File.
- Click Company to view the scanned company details.
- Click the Repair button.
- Click the Customer button to view customer-related information.
- A Save As dialog box will appear. Select the version and directory.
- Click the Vendor button to view vendor-related information.
- After the repair process finishes, a message will appear on the screen.
- Click the Employees button to view employee-related information.
- Click the Start button to begin the repair process.
- Press OK to close the window after completion.
Method 6: Update Windows
- Click the Start tab.
- Click the Settings tab.
- Go to the Update and Security tab.
- Click on Windows Update, then select Check for Updates.
- Look for any available updates.
- If updates are found, they will be installed automatically.
- Reboot the system after the updates are installed.
Method 7: Run QuickBooks Install Diagnostic Tool

- Download the QuickBooks Tool Hub from the official website.
- Save the file to an easy-to-access location.
- Click the downloaded file to start the installation.
- Click Yes to accept the license agreement.
- Click Next, then Install.
- Follow the on-screen steps to finish the installation.
- Once installed, click Finish.
- Open the QuickBooks Tool Hub software.
- Go to the Installation Problems tab and select QuickBooks Install Diagnostic Tool.
- Run the tool and wait for it to configure.
- Allow the tool to Analyze and fix the issues.
- After the process is complete, reboot your system.
Method 8: Restart System in Selective Startup
- Press Windows + R to open the Run box.
- Type MSCONFIG in the box and click OK.
- In the General tab, select Selective Startup and uncheck Load Startup Items.
- Click OK and select Restart if prompted.
- Uninstall and reinstall QuickBooks.
Return to Regular Mode After Reinstallation:
- Press Windows + R to open the Run box.
- Type MSCONFIG in the box and click OK.
- Select Normal Startup, then click Apply and OK.
- Restart your system to complete the process.
What are the Prerequisites to Fix QuickBooks Install Error Code 1722?
- Install the latest Windows updates.
- Use an administrator account.
- Ensure a stable network.
- Turn off security software temporarily.
- Verify your system is compatible with QuickBooks.
- Run sfc /scannow to fix system files.
- Update .NET, MSXML, and C++ Redistributable.
- Backup your QuickBooks data.
How to Identify QuickBooks QuickBooks Install Error Code 1722?
- QuickBooks setup stops, crashes, or freezes.
- A pop-up displays “Error 1722: There is a problem with this Windows Installer package.”
- The computer becomes slow or unresponsive during installation.
- Windows or QuickBooks closes unexpectedly.
- QuickBooks fails to open or function properly after installation.
- Windows Event Viewer shows error 1722 during the QuickBooks installation.
How to Prevent QuickBooks Install Error Code 1722?
- Install Windows updates regularly to maintain system compatibility.
- Download QuickBooks only from the official Intuit website.
- Run sfc/scannow and DISM commands to fix corrupted system files.
- Keep .NET Framework, MSXML, and C++ Redistributable up to date.
- Turn off antivirus/firewall during installation to prevent interference.
- Use QuickBooks automatic tools to detect and fix installation issues.
- Install QuickBooks with administrator rights.
- Verify your PC meets QuickBooks minimum specifications.
When Should You Seek Professional Help for QuickBooks Install Error Code 1722?
Get professional help for QuickBooks Install Error Code 1722 if the error persists after troubleshooting. If QuickBooks fails to install even after using the Install Diagnostic Tool, updating Windows, and repairing Microsoft components, assistance is needed. Contact us if the error causes system crashes or freezing or affects other programs. Professional help is also required if you are not familiar with advanced troubleshooting, registry changes, or system file repairs to prevent further issues.
Hire QuickBooks Install Error 1722 Resolution Services
Hiring professional services can save time and prevent issues with QuickBooks Install Error Code 1722. Many users choose expert help due to a lack of technical knowledge, troubleshooting complexity, or concerns about damaging system files. Our professionals offer quick, reliable solutions, minimizing disruptions. We provide trusted QuickBooks installation support with certified technicians who fix installation errors. With Dancing Numbers, you get fast service, guaranteed fixes, and secure data handling. Our experts focus on delivering high-quality solutions and customer satisfaction. Get in touch with us to fix QuickBooks Error by
+1-800-596-0806 or chat with experts.

