Credit memos serve as official documents to record refunds in business transactions. Buyers typically issue these commercial documents to acknowledge refunds they have made. QuickBooks displays credit memos in the Accounts Receivable tab within the customer center section.
Credit memos increase a customer’s total credit, making it crucial to understand their creation, management, and deletion process in QuickBooks. If you create memos in error, deleting them is preferable to applying them to specific transactions.
What is a Credit Memo?
A credit memo records store credit or refunds given to customers for purchases or services. These credits appear in the Accounts Receivable record in the Customer Center. Credit memos increase the customer’s existing credit balance.
Types of Credit Memos
- Full Credit Memos: These cover the entire amount of an invoice.
- Partial Credit Memos: These cover only a portion of an invoice amount.
- Overpayment Credit Memos: Used when a customer pays more than the invoice amount.
- Return Credit Memos: Issued when a customer returns goods.
Importance of Credit Memos in Accounting
Credit memos play a crucial role in maintaining accurate financial records:
- They ensure proper tracking of refunds and returns.
- Credit memos help maintain correct customer balances.
- They contribute to precise revenue reporting.
- Credit memos assist in reconciling accounts receivable.
Delete vs. Void vs. Unapply: Which Should You Use?
Before removing a credit memo, it’s important to choose the option that best fits your situation. Each action works differently and can affect your records in different ways.
Deleting a Credit Memo
When you delete a credit memo, it is removed from your QuickBooks records. This option is best if the credit memo was created by mistake or is a duplicate that should not exist. While the action is recorded in the Audit Log, the credit memo itself is no longer available in your transactions.
Voiding a Credit Memo
Voiding a credit memo keeps the transaction in your records but changes its value to zero. This allows you to maintain a history of the credit memo while showing that it was cancelled. It’s a good option when you need an audit trail, especially for transactions in reconciled or closed accounting periods.
Unapplying a Credit Memo
Unapplying a credit memo removes it from the invoice or bill it was applied to, but the credit itself remains available. This is useful when the credit memo was applied to the wrong transaction and needs to be used somewhere else instead.
In simple terms, delete a credit memo if it was created in error, void it if you want to cancel it but keep a record, and unapply it if you need to move the credit to a different transaction.
Applying Credit Memos
After creating a credit memo, you can apply it in several ways:
- Apply to an Invoice: Use the credit memo to reduce the amount due on a specific invoice.
- Refund the Amount: Issue a refund check to the customer for the credit amount.
- Retain as a Credit: Keep the credit on the customer’s account for future use.
To Apply for a Credit Memo:
 Apply a Credit Memo
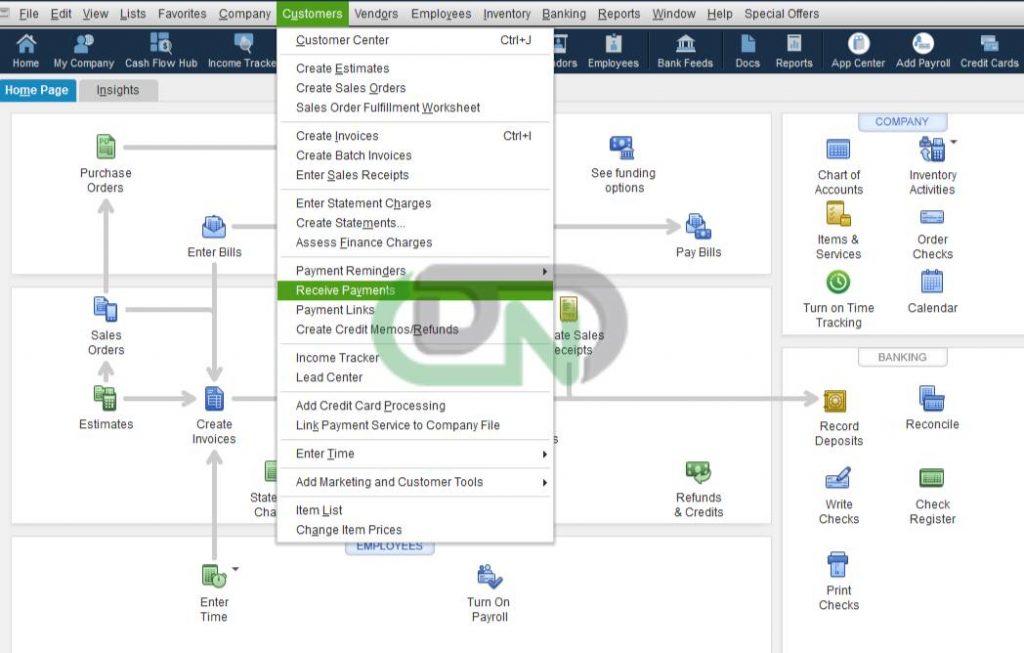
- Go to the “Customers” menu and select “Receive Payments“.
- Choose the customer and the invoice to apply the credit.
- In the “Credits” section, select the credit memo to apply.
- Save the transaction.
Reasons for Deleting a Credit Memo in QuickBooks
QuickBooks uses credit memos when customers receive refunds or money back for product or service purchases. These credits appear in the Accounts Receivable register. Since credit memos increase the credit on a customer’s account, deleting or canceling them becomes necessary in certain situations:
- Erroneously Created Memos: If you’ve created a credit memo by mistake.
- Duplicate Entries: When the same credit memo is entered twice.
- Incorrect Amounts: If the credit memo amount is incorrect and needs to be reissued.
- Canceled Refunds: When a planned refund or credit is canceled.
- Accounting Adjustments: To make necessary adjustments in your books.
Before You Delete: Reconciliation and Balance Warning
Before deleting a credit memo, take a moment to review how it’s being used in your QuickBooks records.
Deleting a credit memo permanently removes it from your transactions. If the credit memo has already been applied to an invoice, included in another transaction, or falls within a reconciled accounting period, removing it can affect customer balances and change previously recorded financial information.
It’s a good idea to check whether the credit memo is linked to other transactions before proceeding. If the credit memo belongs to a closed or reconciled period, voiding it may be a better option because it preserves the transaction history while cancelling the amount.
To avoid losing important information, consider saving a copy of the credit memo or taking a screenshot before you delete it.
How to Delete a Credit Memo in QuickBooks Online
If the credit memo has not been applied to an invoice or linked to another transaction, you can delete it directly from QuickBooks.
Follow these steps to delete a credit memo in QBO:
- From the left navigation menu, select Sales and then All Sales. In some QuickBooks versions, you may need to open Customers instead.
- Find the credit memo you want to remove.
- Select Edit from the Action column.
- At the bottom of the credit memo, select More.
- Select Delete.
- Select Yes to confirm the deletion.
Once completed, the credit memo will be permanently removed from your records.
If QuickBooks does not allow you to delete the credit memo, it may already be applied to an invoice, included in a deposit, or linked to another transaction. In that case, you’ll need to remove those connections before the credit memo can be deleted.
How to Delete a Credit Memo in QuickBooks Desktop
If the credit memo is no longer needed and isn’t linked to any important transactions, you can delete it directly in QuickBooks Desktop.
- Open QuickBooks Desktop and select Customers from the top menu.
- Select Customer Center and open the Customers & Jobs tab.
- Choose the customer associated with the credit memo.
- Open the credit memo you want to remove.
- Select Edit from the top menu.
- Select Delete Credit Memo. You can also press Ctrl + D on your keyboard.
- Select OK to confirm.
Once deleted, the credit memo is permanently removed from your company file.
If you need to cancel the credit memo but still want to keep a record of it, consider voiding the credit memo instead. This keeps the transaction in your records while changing its value to zero.
How to Void a Credit Memo (If You Want to Keep the Record)
If you want to cancel a credit memo but keep a record of it in QuickBooks, voiding is usually the better option.
When you void a credit memo, QuickBooks changes its amount to zero while keeping the transaction in your records. This is especially useful if the credit memo belongs to a reconciled or closed accounting period and you need to maintain an audit trail.
Follow these steps:
- Open the credit memo from the Customer Center in QuickBooks Desktop or All Sales in QuickBooks Online.
- Select Edit (Desktop) or More (Online).
- Select Void Credit Memo.
- Select Confirm or Yes to complete the process.
Once voided, the credit memo remains visible in your transaction history and reports, but its balance is reduced to zero.
Why Can’t I Delete My Credit Memo? (Applied or Deposited Credits)
If QuickBooks won’t let you delete a credit memo, it’s usually because the credit memo is still connected to another transaction.
You may see an error message indicating that the transaction is linked to a payment, invoice, or deposit. In this case, you’ll need to remove the connection before the credit memo can be deleted.
If the Credit Memo Is Applied to an Invoice
When a credit memo has been applied to an invoice, QuickBooks prevents you from deleting it until the credit is removed.
Follow these steps:
- Open the invoice that received the credit.
- Select the credit memo link or the Apply Credits option.
- Remove the applied credit memo.
- Save the invoice.
- Return to the credit memo and try deleting it again.
Once the credit is no longer attached to the invoice, QuickBooks should allow the deletion.
If the Credit Memo Is Linked to a Deposit
A credit memo that has been included in a deposit must be detached before it can be removed.
Follow these steps:
- Open Accounting and select Chart of Accounts in QuickBooks Online. In QuickBooks Desktop, open the Chart of Accounts from the Lists menu.
- Locate the bank account or Undeposited Funds account associated with the transaction.
- Open the account register.
- Find the deposit that contains the linked transaction.
- Remove the linked payment or transaction from the deposit and save your changes.
- Open the credit memo and delete it.
After the connection is removed, the credit memo can be deleted normally.
If the credit memo belongs to a reconciled period, review your reconciliation records afterward to ensure everything remains accurate.
How to Delete Multiple Credit Memos at Once
If you need to remove multiple credit memos, deleting them one at a time can be time-consuming. A bulk-delete tool can help you clean up large batches of duplicate or unwanted credit memos more efficiently.
Follow these steps to delete multiple credit memos at once:
- Connect your QuickBooks company file to the Dancing Numbers Application.
- Open the Delete/Void feature.
- Select Credit Memos as the transaction type.
- Use filters such as date range, customer name, amount, or reference number to find the credit memos you want to remove.
- Review the selected transactions carefully.
- Export or back up the selected credit memos if you want to keep a record.
- Confirm the bulk deletion.
Once the process is complete, all selected credit memos will be removed at the same time. Because bulk deletion is permanent, it’s recommended to create a backup or export a copy of the transactions before proceeding.
How to Recover a Deleted Credit Memo
If you accidentally delete a credit memo, QuickBooks does not provide a direct option to restore it. However, you can use the Audit Log or Audit Trail to recover the transaction details and recreate the credit memo manually.
In QuickBooks Online
- Select the Settings icon and choose Audit Log.
- Use the available filters to search by date, user, or event type.
- Locate the deleted credit memo entry.
- Select View to review the original transaction details, including the customer, date, amount, and items.
- Create a new credit memo using the same information.
In QuickBooks Desktop
- Open the Reports menu.
- Select Accountant & Taxes and then Audit Trail.
- Find the deleted credit memo in the report.
- Review the transaction details.
- Re-enter the credit memo manually in QuickBooks.
While deleted credit memos cannot be restored with a single click, the audit records make it possible to recover the information and recreate the transaction when needed.
Impact of Deleting a Credit Memo
Before deleting a credit memo, it’s important to understand how it can affect your QuickBooks records.
- When a credit memo is deleted, the customer’s available credit is reduced by the amount of that credit memo. This can change outstanding balances and affect future transactions that could have used the credit.
- The credit memo is removed from your active transaction list, although a record of the deletion remains available in the Audit Log or Audit Trail. Any reports that previously included the credit memo will also update to reflect its removal.
- Deleting a credit memo can also impact your Accounts Receivable balance, since the transaction is no longer part of your financial records.
- If the credit memo was applied to an invoice, included in a deposit, or part of a reconciled period, deleting it may affect those related transactions as well. In such cases, you may need to review customer balances, deposits, or reconciliations to ensure your records remain accurate.
Best Practices for Managing Credit Memos
To effectively manage credit memos in QuickBooks:
- Regular Review: Periodically review open credit memos to ensure accuracy.
- Proper Documentation: Always document the reason for issuing or deleting a credit memo.
- Timely Application: Apply credit memos to invoices promptly to maintain accurate customer balances.
- Communication: Inform customers when a credit memo is issued or applied to their account.
- Backup: Regularly back up your QuickBooks data to prevent loss of credit memo information.
Troubleshooting Common Credit Memo Issues
- Credit Memo Not Showing: Ensure the date range in your reports includes the credit memo date.
- Unable to Delete: Check if the credit memo has already been applied to an invoice or payment.
- Incorrect Amount: Void the incorrect credit memo and create a new one with the correct amount.
- Credit Memo Affecting Wrong Account: Verify the account selection when creating the credit memo.
Reporting on Credit Memos
QuickBooks offers several reports to track and analyze credit memos:
- Open Credit Memos: Shows all unapplied credit memos.
- Transaction List by Customer: Includes all transactions, including credit memos, for each customer.
- Customer Balance Detail: Provides a detailed view of customer balances, including applied and unapplied credit memos.
- Sales by Customer Summary: Includes the impact of credit memos on overall sales figures.
To Access these Reports:
 To Access these Reports
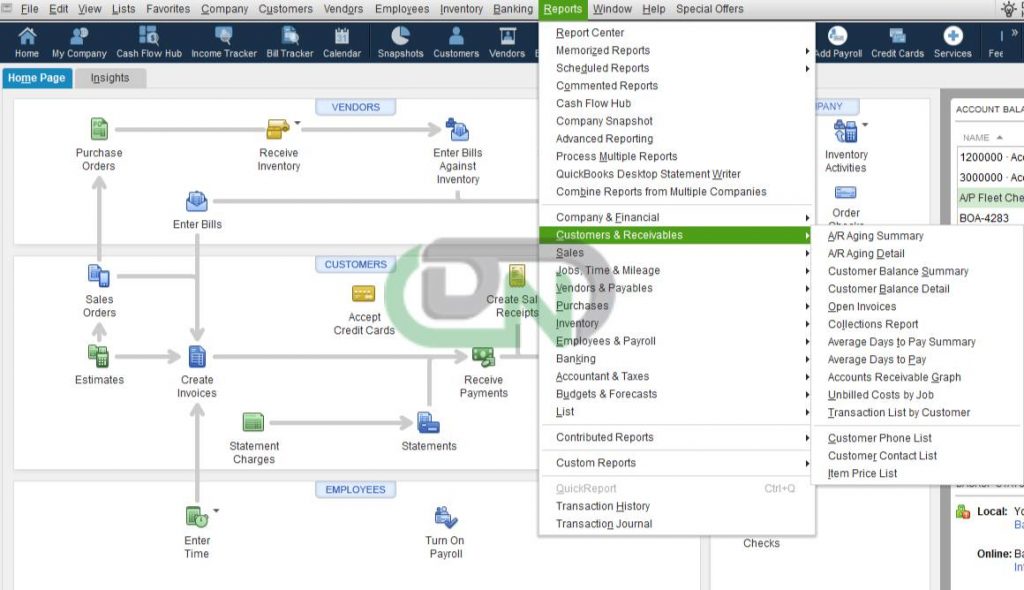
- Go to the “Reports” menu.
- Select “Customers & Receivables“.
- Choose the desired report from the list.
Integrating Credit Memos with Other QuickBooks Features
Credit memos in QuickBooks integrate seamlessly with other features:
- Inventory Management: When items are returned, credit memos can automatically update inventory levels.
- Sales Tax: Credit memos adjust sales tax calculations for accurate reporting.
- Customer Statements: Applied credit memos appear on customer statements, providing a clear account history.
- Financial Reports: Credit memos impact financial statements, including the Balance Sheet and Profit & Loss reports.
By understanding and effectively managing credit memos in QuickBooks, businesses can maintain accurate financial records, improve customer relations, and streamline their accounting processes.
Accounting Professionals, CPA, Enterprises, Owners
Looking for a professional expert to get the right assistance for your problems? Here, we have a team of professional and experienced team members to fix your technical, functional, data transfer, installation, update, upgrade, or data migrations errors. We are here at Dancing Numbers available to assist you with all your queries. To fix these queries you can get in touch with us via a toll-free number
+1-800-596-0806 or chat with experts.
Frequently Asked Questions (Faqs)
What’s the difference between deleting and voiding a credit memo?
Deleting removes the credit memo from your active records, while voiding keeps it on file but changes the amount to zero. Delete mistakes or duplicates; void transactions when you need to keep an audit trail.
Why can’t I delete a credit memo in QuickBooks?
The credit memo is likely linked to an invoice or deposit. You’ll need to remove that connection before QuickBooks allows you to delete the transaction.
Does Deleting a credit memo affect reconciliation or the customer’s Balance?
Yes. Deleting a credit memo reduces the customer’s available credit and updates Accounts Receivable. If it’s part of a reconciled period, you may need to review the reconciliation afterward.
Can I Recover a Deleted Credit memo?
There’s no restore option, but you can find the original details in the Audit Log (Online) or Audit Trail report (Desktop) and recreate the credit memo manually.
How do I Delete Multiple Credit memos at once?
QuickBooks only deletes credit memos individually. For bulk removal, you can use a tool like Dancing Numbers to filter and delete multiple credit memos at once. Back them up first, as deletion is permanent.
ow do I Delete a Credit memo in QuickBooks Online?
Go to Sales > All Sales, open the credit memo, select More, choose Delete, and confirm the action.

