It is very important to mark an invoice that is paid in QuickBooks. This is because it helps in trouble-free accounting. If you miss out on marking an invoice paid in QuickBooks, It disrupts the balance.
Dancing Numbers helps small businesses, entrepreneurs, and CPAs to do smart transferring of data to and from QuickBooks Desktop. Utilize import, export, and delete services of Dancing Numbers software.
Marking an Invoice Paid in QuickBooks Online
With the cloud-based accounting solution QuickBooks Online, you can access your data from anywhere. To mark an invoice as paid in QuickBooks Online, you have to follow the below steps:
Step 1: Log in to Your QuickBooks Online Account
Using your login information, you can sign in to your QuickBooks Online account. You will then be taken to the dashboard, Which is the main hub for managing your accounting tasks.
Step 2: Go to Get Paid and Pay
Find the main menu on the left side of the screen after logging in. Choose the Get Paid and Pay tab by scrolling down. You may access all of your invoices by going to the sales menu using this.
Step 3: Find the Invoice
You can choose from a number of options under the Get Paid and Pay menu, which includes options such as Invoices, Customers, Products and Services, and more. To view a complete list of all the invoices you have created, you have to select the Invoices option.
Step 4: Locate the Unpaid Invoice
To mark an invoice as paid, find it in the list of invoices by scanning it. You can use the search bar by entering relevant details like the invoice number, customer name, or other identifying information to simplify your search. To make the identification process easier, you can also categorize the bills by date or customer name.
Step 5: Keep a Record of Payments
The view of the invoice details contains the Receive Payment button. To open a new window created just for recording the payment related with the invoice, you have to click this button. The required information can be entered in this window to appropriately record the invoice payment.
Step 6: The Payment Details Beed to be Filled
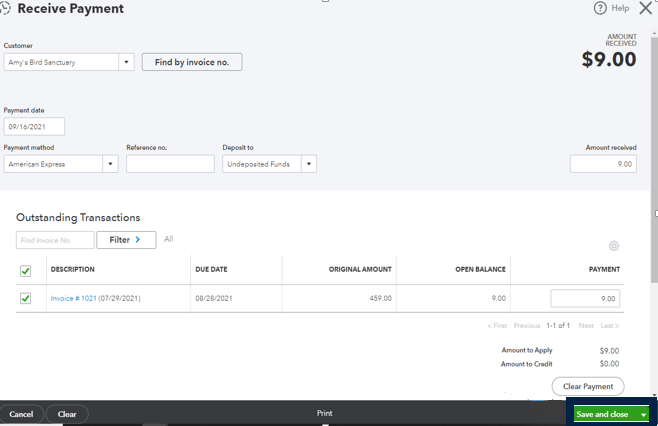
The payment amount can be entered in the designated field. Select a suitable payment option, such as cash, a check, a credit card, or a bank transfer. Choose other and add additional details in the notes section if the chosen method is not listed.
Step 7: Apply the Payment to the Invoice
You must apply the payment to the specific invoice after entering the payment details. You have to check the box corresponding to the invoice if the payment is for the full invoice amount. Enter the amount received that the payment applies to if it is only a partial payment.
Step 8: Save the Payment
Once the payments have been added to the invoice, check the data to make sure they are accurate. Click Save and Close to save the money and mark the invoice as paid if everything seems correct.
Step 9: Invoice Status must be Verified
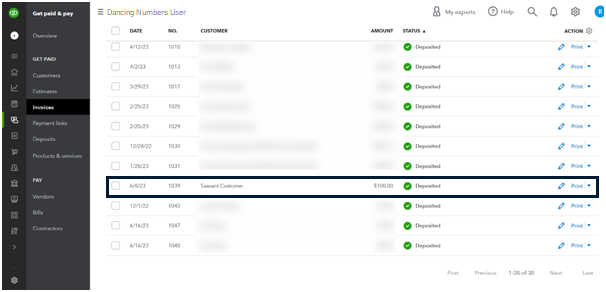
The invoice list will appear after you save the payment. Search for the invoice you marked as paid, and make sure the status has changed to Paid. The status of the invoice will be instantly updated by QuickBooks, and it will appear as paid in your financial reports.
Marking an Invoice Paid in QuickBooks Desktop
Step 1: Launch QuickBooks Desktop
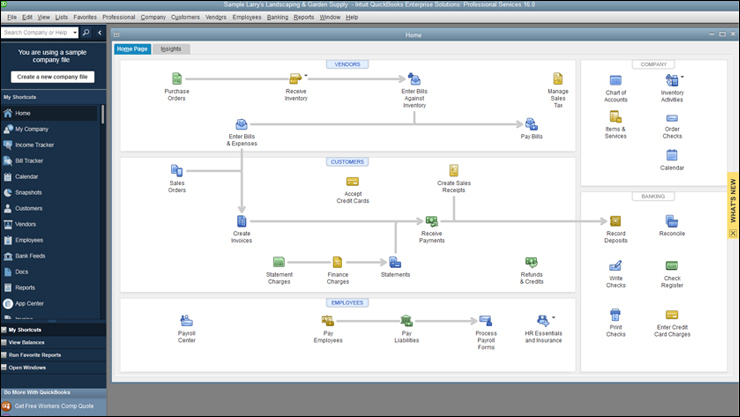
By double-clicking the QuickBooks icon or choosing it from the list of programs, you may start the QuickBooks Desktop application on your computer.
Step 2: Open the Invoice
After accessing the QuickBooks Desktop application
- You have to go to the top of the screen and find the Customers menu
- Then you have to click on it to display a drop-down menu
- You have to select Customer Centre from the drop-down menu.
Step 3: Locate the Unpaid Invoice
The Estimates, Sales Orders, Invoices, Statement Charges, Sales Receipts, Received Payments, Credit Memos, and Refunds tab can be found in the Customer Center. To view all the recorded invoices, you have to choose Invoices from the list. The invoice that needs to be marked for payment might be selected.
Step 4: Choose the Invoice Option
You have to click on the invoice to select it and open the invoice details.
Step 5: The Payment Should be Recorded
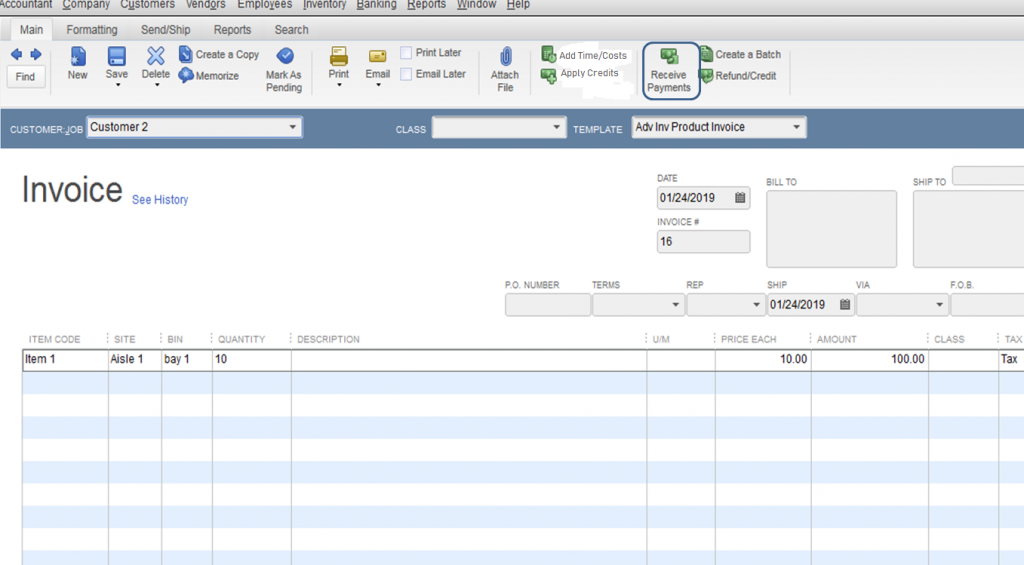
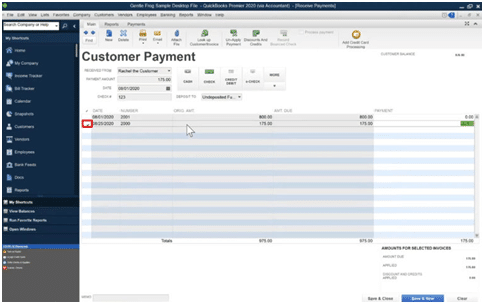
Navigate to the top of the page when in the invoice details view and then click the Receive Payment button. By doing this step the Receive Payments window will open, it will access you to record and process the payment for the invoice.
Step 6: Choosing the Right Customer
Make sure the correct customer is selected for the payment in the Receive Payments window. By selecting the customer’s name from the provided drop-down list, you can change the customer as necessary. This step makes sure that the intended customer is properly credited with the payment.
Step 7: Provide the Payment Information
You have to enter the relevant payment information, such as the payment date, the payment method, and the amount received, in the Receive Payments window. You can choose other and add more information in the notes section if the desired payment method is not available in the options shown.
Step 8: Pay the Invoice with the Payment
It is important to appropriately apply the payment to the particular invoice after entering the payment information in the Receive Payments window. The invoice that needs to be marked as paid can be found in the window’s Outstanding Transactions section. In order to appropriately record the payment transaction, you have to make sure the amount received matches to the invoice.
Step 9: Save the Payment
It is important to review the data before finalizing the transaction after applying the payment to the invoice and checking the accuracy of the details. You have to click Save and Close if you are confident with the accuracy of the payment details.
Step 10: Invoice Status Should be Verified
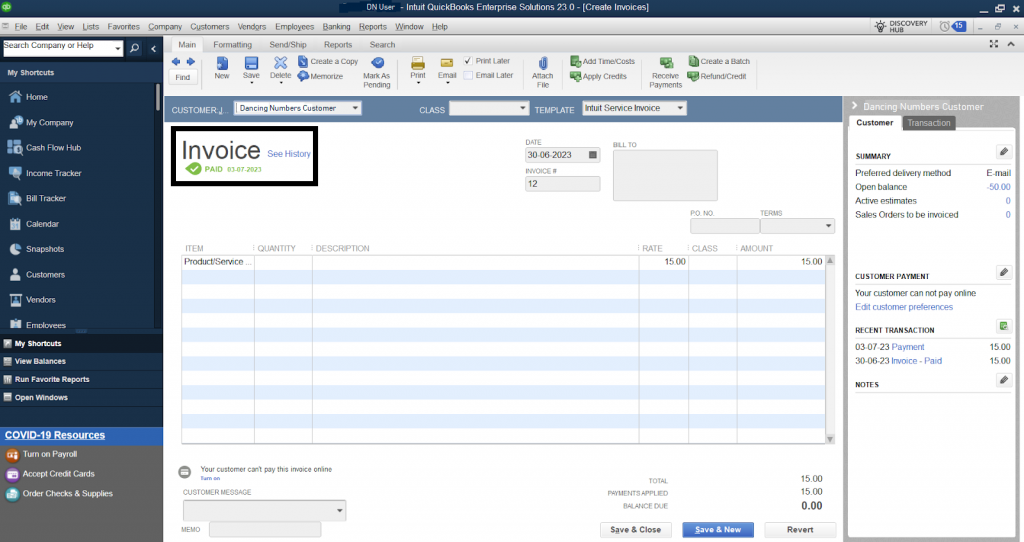
You’ll be taken to the invoice details view once you’ve saved the file in QuickBooks Desktop. Find the invoice you paid and marked as such. Check that QuickBooks Desktop has applied and recorded the payment.
How to Mark a Bill Paid in Your QuickBooks?
Here are the steps:
- Navigate to your Bank Feeds page.
- Keep a check-mark on the particular Transaction.
- Navigate to the Action column.
- Press Select Bills to Mark as Paid.
- Add the required information.
- Choose Add to QuickBooks.
How to Change an Invoice from Paid to Unpaid in QuickBooks?
Here are the steps:
- Select Sales and then Click it.
- Choose Invoices.
- Press on the invoice you wish to Reverse the Payment.
- Press on the 1 payment link.
- Choose the Date you wish to reverse the payment.
- Press More.
Note: Payments are applied to any particular invoice via deposit. Users will be able to add tags and descriptions to the invoices for improved classification. Additionally, it is also recommended to have a proper record of the paid invoices in the right format in order to avoid any kind of problem that can attract penalties.
We hope that with the solutions given above, marking an invoice paid in QuickBooks will be quite easier now. Just make sure that while marking an invoice paid in QuickBooks, do not miss out any step given above. Every step must be followed accordingly.
Related Article: Past Due Invoices When a Client Doesn’t Pay
However, If you still feel less confident about marking an invoice paid in QuickBooks on your own, or having some problems, you can seek professional guidance.

Looking for a professional expert to get the right assistance for your problems? Here, we have a team of professional and experienced team members to fix your technical, functional, data transfer, installation, update, upgrade, or data migrations errors. We are here at Dancing Numbers available to assist you with all your queries. To fix these queries you can get in touch with us via a toll-free number
+1-800-596-0806 or chat with experts.
Frequently Asked Questions (Faqs)
How to Apply a Customer’s Payment to a Particular Invoice Properly?
Here are the steps:
Step 1: Go to your QuickBooks, Press on Customers, and then select to Receive Payments from the options given.
Step 2: In the particular field that says, ‘Received From‘, Add the name of the customer.
Step 3: Choose the invoice you wish to Apply a Payment to, And then add the amount.
This is how you apply for a payment properly to a Customer’s Invoice.
How to Mark a Particular Receipt for a Specific Customer?
Here are the steps:
Step 1: Launch the QuickBooks into your system and then navigate to the customer option and then from there you will reach the customer center.
Step 2: From the particular list on the left, Choose the customer name and then press on new transactions and select receipt or statement.
Step 3: Then you press on Balance Forward.
What are the Problems that may Occur When the Payments are not Recorded in QuickBooks the Right Way?
Several problems may occur when the payments are not recorded in QuickBooks the right way. Here are a few:
 Exaggerated Accounts Receivable Balances: The amount, Which customers owe, will be incorrect if the payments are applied wrongly.
 Paid Invoices Stay Open: If the payments are implemented to the right invoice, the invoice will display outstanding, although the client has already paid for it. This will impact customer relations.
 Exaggerated Income: Payments received and wrongly recorded as deposits will be seen as an income. Although, income was initially recorded when the original invoice was generated.
How to Unapply or Remove a Particular Credit from an Invoice?
Here are the steps:
Step 1: Find the Right Credit Memo.
Step 2: Click Ctrl + H in order to show the History.
Step 3: Select Apply Credits.
Step 4: On the initially applied Credits screen, Clear the selection for Credit.
Step 5: On the particular Apply Credit Window, Choose Done.
Step 6: On the Particular Invoice, Choose Save and Close.
How to Receipt for a Single Customer?
Receipt for a Single Customer is very easy. Here are the steps:
Step 1: First you need to open the QuickBooks application in your system and then select CUSTOMER and then choose the CUSTOMER CENTER.
Step 2: Press the CUSTOMER NAME on the list that is given on the left and can be scrolled easily.
Step 3: On the table, on the upper-right end, Press on the NEW TRANSACTION drop-down arrow and then choose STATEMENT.
Step 4: Press to choose BALANCE forward.


 +1-800-596-0806