
 |
Excel CSV files stand for comma-separated values. These are known as the general text files of excel spreadsheets. QuickBooks Online permits you to import such CSV formatted files like a credit card, invoices, bank transaction into the program. You can import these files anytime required to keep records up to date. This article is rounded up with useful steps to Import CSV Excel Files to QuickBooks Online.
Dancing Numbers helps small businesses, entrepreneurs, and CPAs to do smart transferring of data to and from QuickBooks Online. Utilize import, export, and delete services of Dancing Numbers software.
Import CSV Excel Files to QuickBooks Online
The QuickBooks Online allows CSV files importing in a 3 or 4-column template format. The 3-column format includes the date, amount, and description whereas 4-column contains the date, description, debit, and credit. After importing you can fill other additional information like category, transaction payee located on For Review option located in the banking tab.
Once you set-up bank protocols and QuickBooks Online discover the descriptions related to transactions it automatically fills the required information. Moreover, you can fill other additional details like transaction payee and transaction categories.
Verify the CSV File Format:
- Make sure the CSV file is formatted properly because when a person attempts to upload the wrong-formatted document the error will display.
- Eliminate zeroes (0) listed in the file and leave those fields clear
- Fix transactions that show a number located in the column named Description
- Take out the word amount displaying in the column named Credit or Debit
- Check and correct if found the wrong date format. Standardize it into a single format.
- Include the date of the week in the Date column, correct the format, divide the date, the weekend day into two individual columns:
- High spot the column with date
- Locate the data then choose Text to Columns
- Review and follow the guidance in Wizard named Convert Text to Columns Wizard, select the preferred option
- Hit on Finish
Things You Need to Know Before Beginning:
There are many options QuickBooks provide for importing Excel files including Chart of Accounts, Items, Customer, and supplier invoices.
Here are the Things You Require to Know:
- To import transaction in QuickBooks you need to know about 3 fields named Date, Amount and Description
- Fill the mandatory fields i.e. clear the field named account and write 0
- Delete the symbols found in the field named Amount like a comma, or sign
- If found Amount field in a single column that you have to write the minus-sign to outline money instead of brackets
- Erase if any non-transactional data found in the file like account numbers, opening or closing balance
- Apply changes and save it.
Import a CSV File to QuickBooks Online
Once you checked CSV files format now you are ready to begin. Follow the below-written steps to import file saved in excel into QuickBooks Online. Follow the steps below for the windows version:
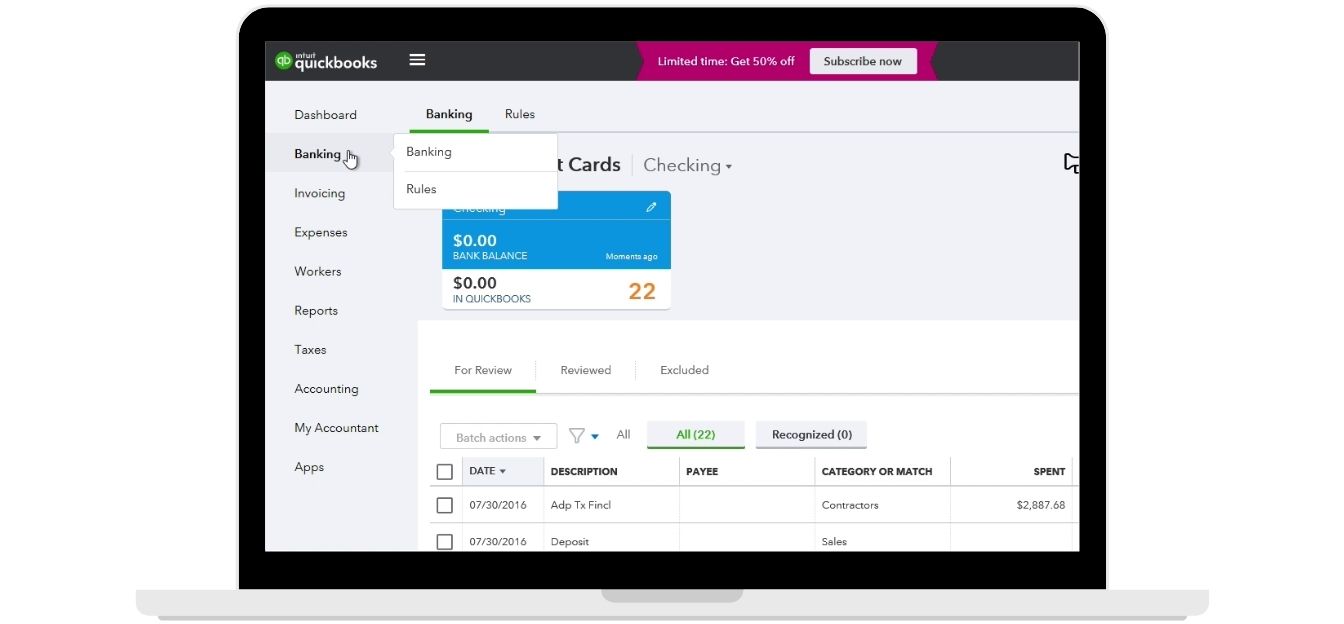
Open your QuickBooks Online account, then import the CSV file that you just created using the import option in the File menu, after that, click on the ‘Banking‘ option
Now in the Banking section, you have to select the account and then to upload the file click on the ‘File Upload‘ button, In your QuickBooks accounting software, you have to search for the option ‘Upload a bank file‘, ‘import a statement‘ and more like this for uploading the CSV file to QuickBooks.
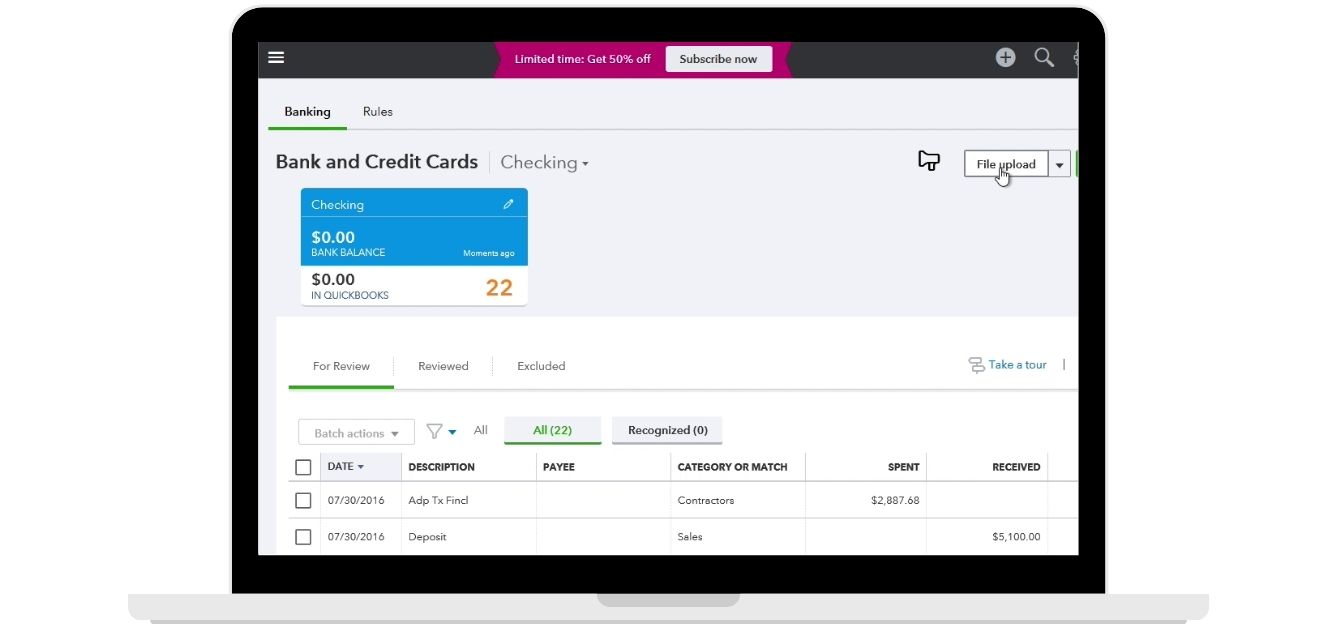
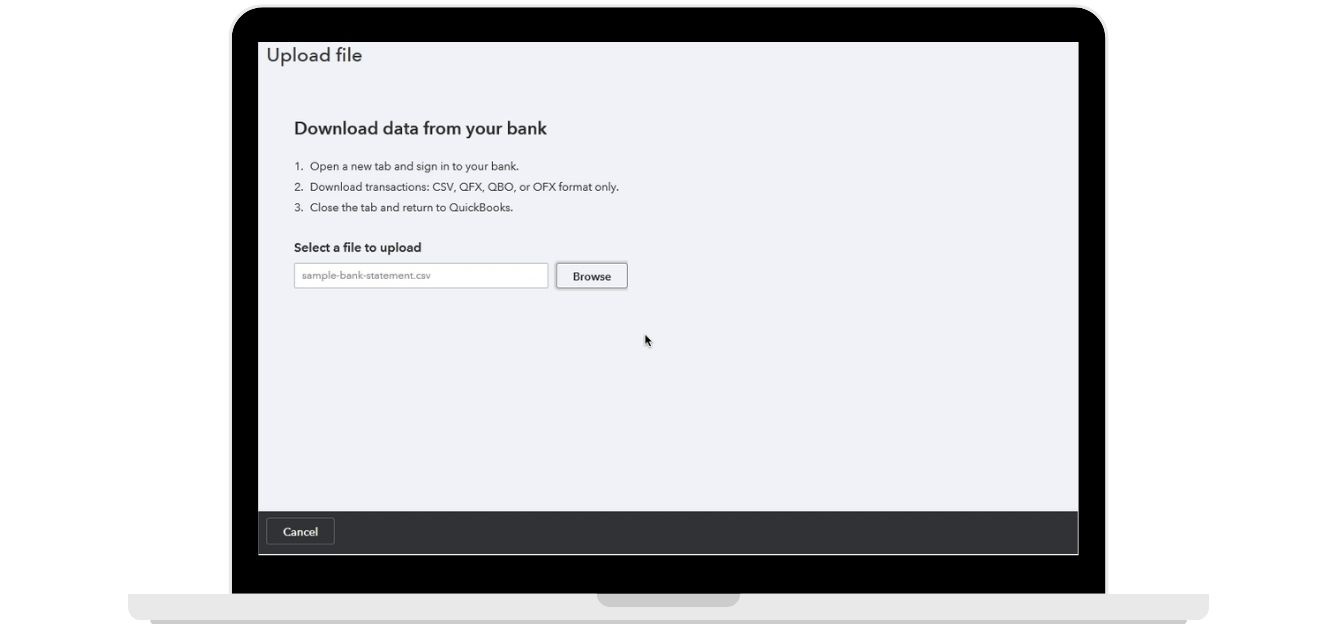
You have to click on the ‘Browse‘ and then find the CSV file and select it then click on the ‘Next‘ button.
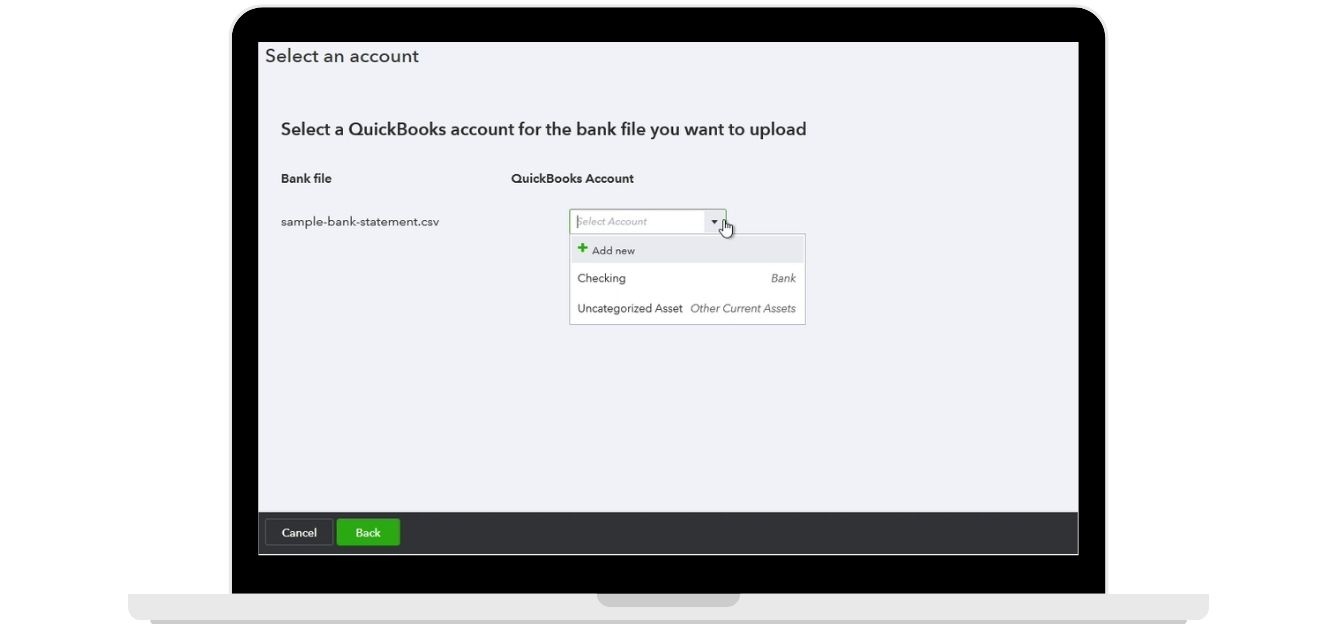
Choose the account in QuickBooks in which you want to import the file and then click on the ‘Next‘ button
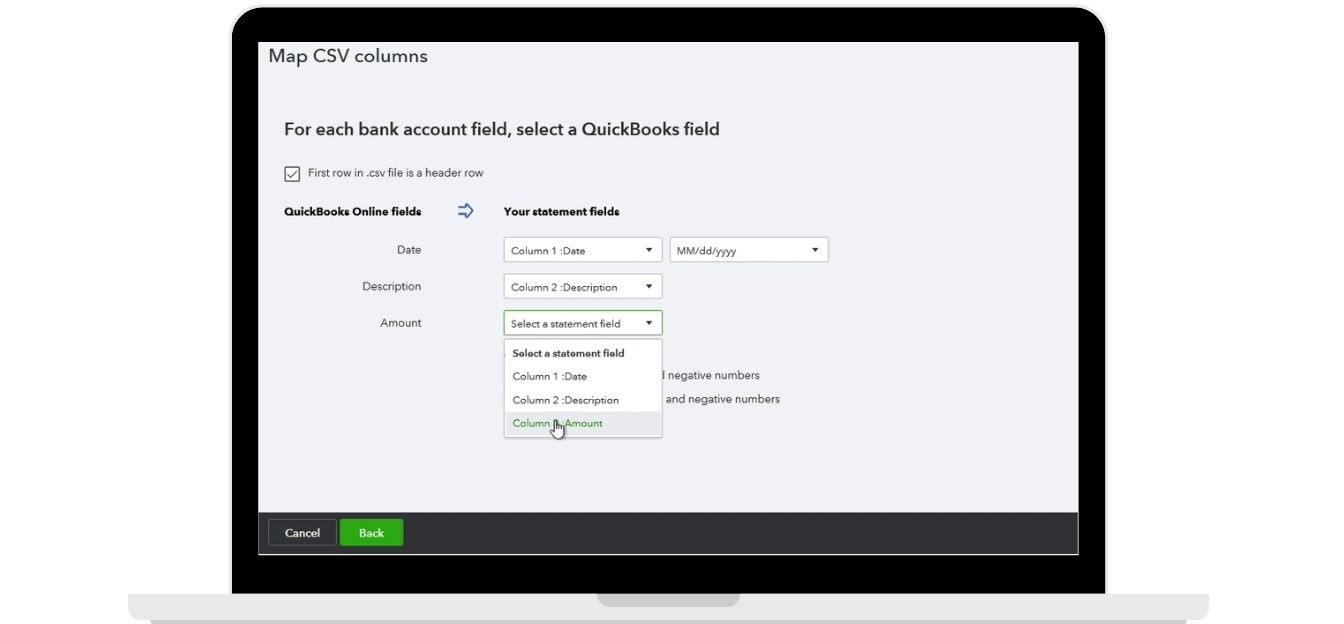
Now, you have to do the mapping and confirm the date format, so the columns of Date and Description are selected automatically, you just have to set the amount column and click on the ‘Next‘ button
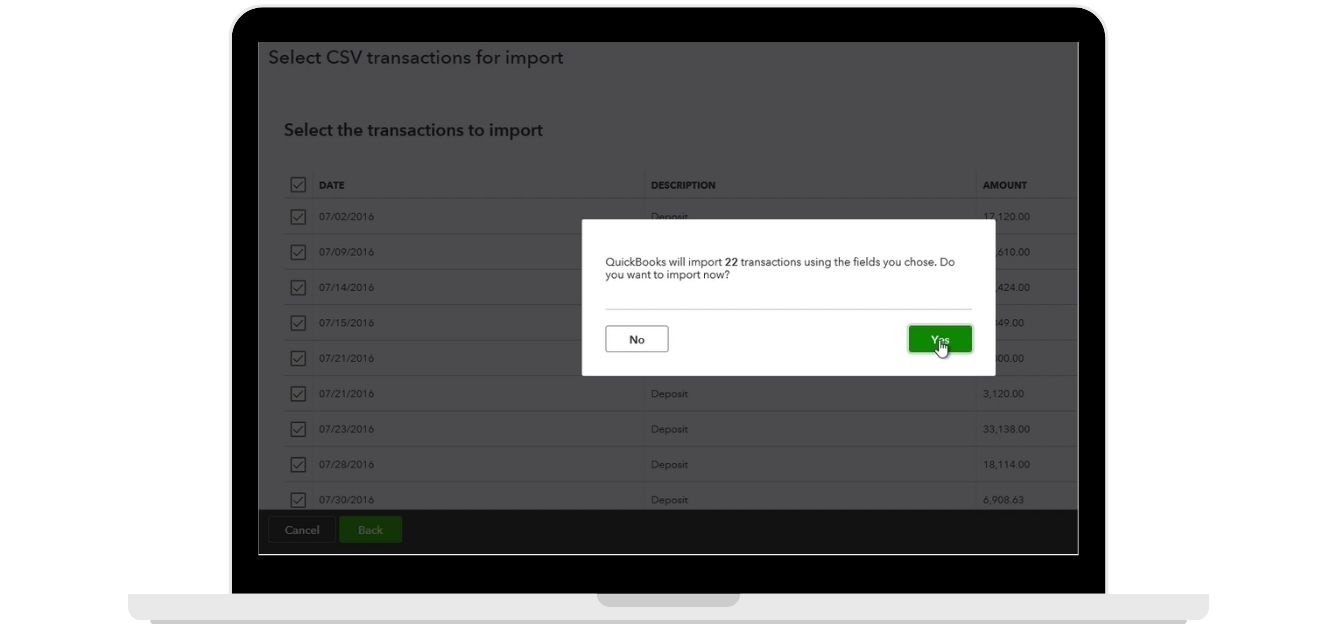
Before doing the import, review all the transactions in your account then click on the button ‘Next‘
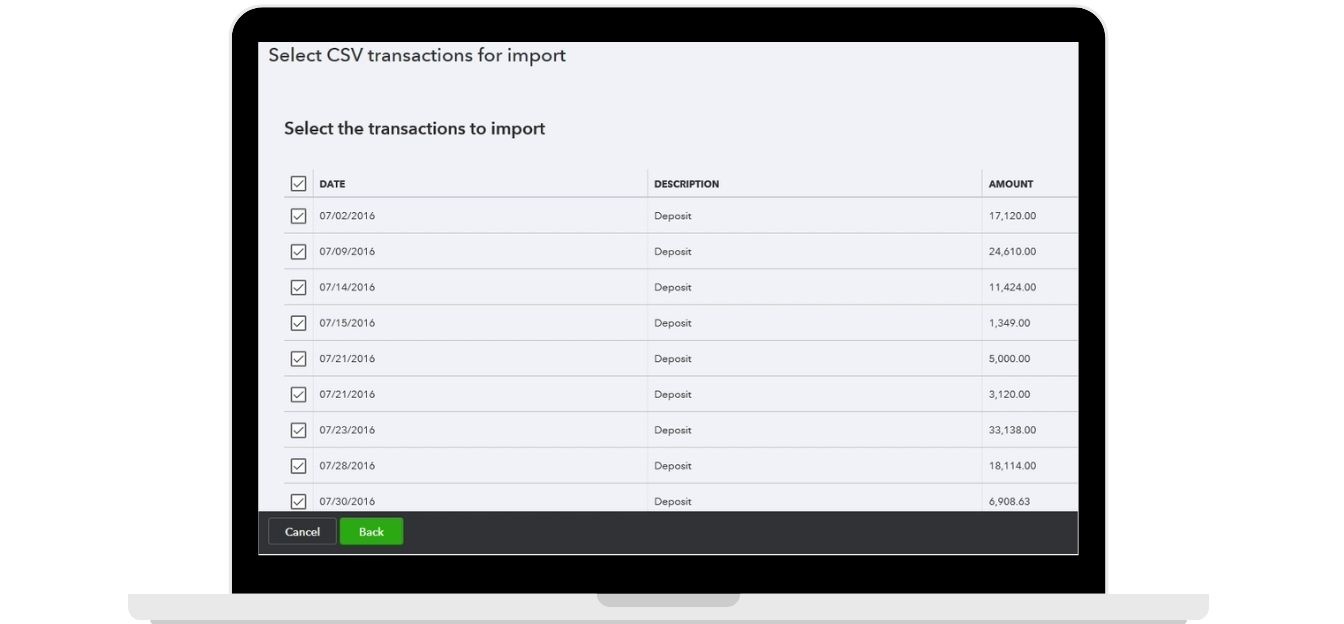
To finish this import process, you have to click on the Next step, When the process is done you can review it and also categorize it under the account.
Once the import of excel files is completed then you are directed toward windows with transactions menu which contain review option so that you can verify the imported transactions and accordingly modify, add, or match if required.
Do Transaction Mapping:
Incorrect mapping leads to error message to prevent this you have to process matching. Through mapping, you are informing QuickBooks on how to import the information from the Excel sheet because there might be a difference in columns. For instance, some column headings listed in QuickBooks are not similar to MS excel sheet, thus sometimes there require to perform matching.
To Match, Follow the Instructions:
- Initially, write a mapping name
- Choose the Account as Import type
- Now match the data fields displaying below QuickBooks with the fields headings and data listed in Excel sheet
- After matching don’t forget to save it
- Hit on Import, then choose Yes to begin the process
That’s all; about importing excel files into QuickBooks Online. We hope this article is handy to provide you useful guidance on import CSV into QuickBooks. You can write a comment if you need any further information. Stay tuned with updated topics on accounting software and its trending component.

Looking for a professional expert to get the right assistance for your problems? Here, we have a team of professional and experienced team members to fix your technical, functional, data transfer, installation, update, upgrade, or data migrations errors. We are here at Dancing Numbers available to assist you with all your queries. To fix these queries you can get in touch with us via a toll-free number
+1-800-596-0806 or chat with experts.
 +1-800-596-0806