In business, Chart of Accounts is very helpful for the accountants, since it helps in proper bookkeeping and efficient business functioning. Setting up a Chart of Accounts in QuickBooks is very crucial since it stands as the pillar of the accounting system that impacts how a report data is grouped or showcased. Know how to export chart of accounts from QuickBooks Online.
Dancing Numbers helps small businesses, entrepreneurs, and CPAs to do smart transferring of data to and from QuickBooks Online. Utilize import, export, and delete services of Dancing Numbers software.
What is Exporting of Chart Accounts from your QuickBooks Online?
Chart of accounts in QuickBooks typically helps to save your time and effort in business. With this, you can keep a track of the expense accounts, customers, items, vendors, etc. of your business.
The good thing is by maintaining a chart of accounts, you will be able to save all your data in one place and can put it to use as and when required.
Why do You need to Export a Chart of Accounts from your QuickBooks Online?
Creating the best business organization is a task that asks for complete dedication, time, and effort, and maintaining a chart of accounts is the best route available.
There are numerous inbuilt reports along with templates available to help you in a task, however, with exporting a chart of accounts in QuickBooks you can simplify your task ten times. This is why a chart of accounts in QuickBooks is imperative for business.
How to Export Chart of Accounts from Your QuickBooks Online?
Before you initiate the export operation, ensure that you have created a copy of the QuickBooks file for the particular organization. The backup copy will prove to be a boon for you in case you misplace any financial detail about the organization during the transfer procedure.
Exporting a chart of accounts along with lists of employees, vendors, and customers is an easy and swift process. All you need to do is follow the procedures mentioned below:
Step 1: Open the particular QuickBooks company file
Step 2: Search for the chart of accounts you wish to export
Step 3: Select File from the specific taskbar
Step 4: Click the Utilities section and select Export
Step 5: Then choose Lists of IIF files
Step 6: A list will be displayed on the window
Step 7: Select the Chart of Accounts option
Step 8: The Save As dialog box will display
Step 9: Save the file by choosing the location from the particular drop-down list.
How to Export Chart of Accounts to Excel in QuickBooks Online?
Did you know how to export your Chart of Accounts in QuickBooks Online to Excel? If not then with the help of this blog post, you will know how to export a chart of accounts to Excel.
Step 1: Navigate to Chart of Accounts
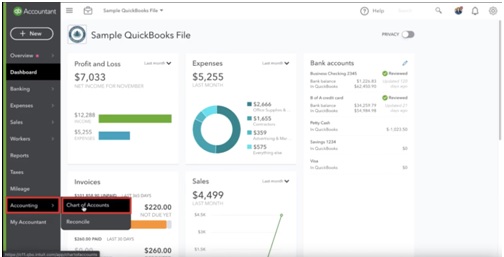
You may see the navigation bar from your dashboard’s left-hand column. There will be about ten items in that navigation bar. You can see the Accounting link at the bottom of the navigation bar. A submenu titled “Chart of Accounts” will appear when you hover over accounting. Click that link.

Step 2: Run Report
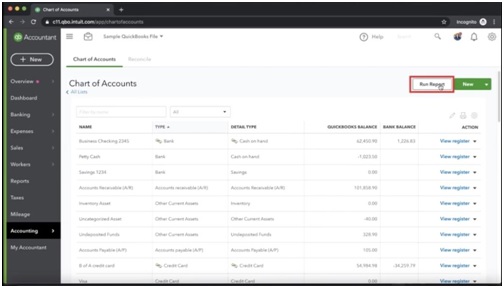
Running the report is the next step in this procedure. This section is fairly simple to understand. If step one was properly completed, the screen you are currently viewing will say Chart of Accounts and will have a button titled “Run Report” in the right hand corner. For reference, there you will see a green “New” button will be located just to the right of the “Run Report” button.

Step 3: Export the Report
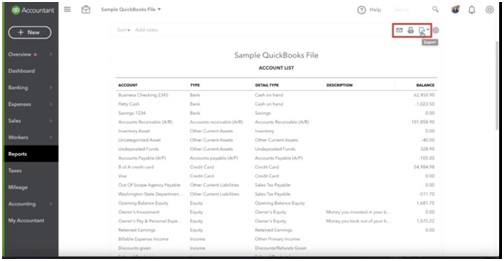
You are directed to a page that has a list of accounts for your QuickBooks Online file after running the report. All of the accounts will be exported, including these. Navigate once more to the upper right-hand column and look for a set of four icons there to export this report. The icons are a gear, a paper with an arrow, a printer, and an envelope. To export this report, click the paper with the arrow on it. By doing this, a download will start, and a report will then be saved on your computer.

Step 4: Confirm Your File Download
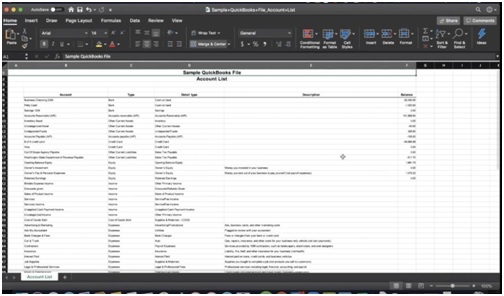
Firstly locate your downloads folder and then open the file. Your file should exactly look like the one below.

Like that. This is how QuickBooks Online exports your chart of accounts to Excel.
In this blog, we have mentioned all the mandatory points regarding Export Chart of Accounts to Excel in QuickBooks Online. But in case you face any issue regarding this then you can call at help desk as they are available round the clock.

Looking for a professional expert to get the right assistance for your problems? Here, we have a team of professional and experienced team members to fix your technical, functional, data transfer, installation, update, upgrade, or data migrations errors. We are here at Dancing Numbers available to assist you with all your queries. To fix these queries you can get in touch with us via a toll-free number
+1-800-596-0806 or chat with experts.
Frequently Asked Questions (Faqs)
Why do You Need to Create a Backup of the Export File?
It is important because it will help in any kind of problems that might arise during the transfer process.
Do You need to Log in as the Administrator Before You Export the Chart of Accounts from QuickBooks Online?
Yes. It is Necessary.
How do I Export a List of Accounts from QuickBooks Online?
● First, you have to go to Business overview and then select Reports.
● Then you have to search for an Account List.
● After that select the Export icon and then choose Export to Excel.
Are You Able to Export Data from QuickBooks Online?
Yes, You can import data into another QuickBooks Online file after exporting it from one. Your data from QuickBooks Online can be immediately exported to Excel. You can save your file using the program’s default file application.
How to Download the Chart of Accounts in QuickBooks Online?
● Select the Run Report option on the Chart of the Account screen.
● You will notice four icons in the upper right corner of the account list: email, print, export, and setting. To export a document to Excel or PDF, choose the export icon.


 +1-800-596-0806